Piwik 2.11.0 curl_exec Operation timed out – Bug Fix

A server I administer running Piwik 2.11.0 web analytics encountered a problem during an automatic upgrade from Piwik 2.11.0 to Piwik 2.11.1.

The error given after clicking the automatic upgrade link was similar to:

curl_exec: Operation timed out after 9984 milliseconds with 12801064 out of 13344050 bytes received.

Hostname requested was: builds.piwik.org

Close, but no cigar. Curl tries to download the 13 megabyte piwik upgrade archive and nearly succeeds but the default curl timeout stops it just short. On servers with huge bandwidth capacity this is probably never a problem but it’s all about getting the file within the default time limit. With insufficient bandwidth, the timeout is reached before the server can finish downloading.

This issue is fixed by using a longer timeout in the latest version. However, if you’re on version 2.11.0 like I was, it doesn’t fix the immediate problem of running into the curl_exec Operation timeout when you try to automatically upgrade to the latest version.

There is a way around which involves editing one line of one file in your current Piwik install. Remember to back-up both your Piwik installation files and your Piwik database before fiddling with the installed files. Misadventure could lead to a broken installation or worse, loss of your analytics data!

Piwik offers this fix in /piwik/plugins/CoreUpdater/Controller.php: https://github.com/piwik/piwik/commit/76e4378b18b2e24853846c38f7eded956ee0eb57 which indicates that the timeout (in seconds) can be changed from 30 to 120 which appears to be the path before the 2.11.2 release but I was stuck on version 2.11.0 which had line 175 reading:

Http::fetchRemoteFile($url, $this->pathPiwikZip);

I therefore changed this line to read:

Http::fetchRemoteFile($url, $this->pathPiwikZip, 0, 120);

I then saved/re-uploaded the file to the server and re-executed the automatic updater which took me straight to the now current 2.11.2 version.

Job done 🙂

Acer Aspire 5315 screen replacement guide

Here follows a procedure for the removal and refitting of the LCD panel on an Acer Aspire 5315 laptop.

The subject machine displayed a corrupted display with a ‘wave’ shape and verticle lines obscuring the image with the right-hand side of the panel blank. This indicated the the LCD panel itself had failed, probably due to impact from a foreign object or excessive torque being applied to the screen during opening/closing of the lid.
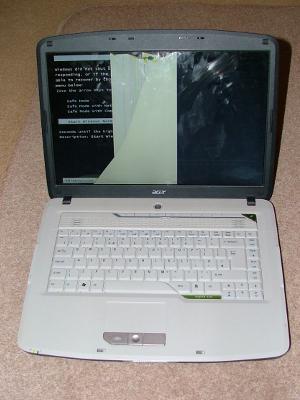
acer-5315-broken-screen

A replacement panel was sourced and fitted using the following method:

First the power lead is disconnected and the battery is removed. The battery has a two-stage lock and release mechanism as shown in the picture below.
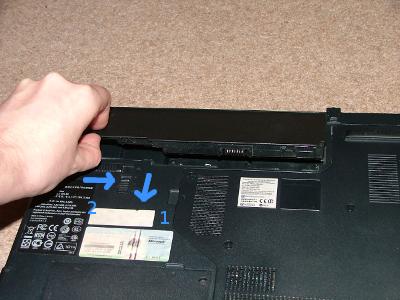
acer-5315-battery-removal

Four rubber pads now need to be removed to expose the fascia securing screws. I managed to use my fingernail to remove them, it may be neccesary to use tweezers or a sharp implement to prise them out.
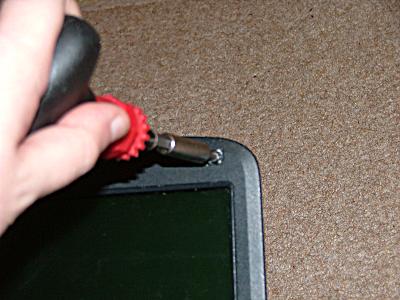
acer-5315-screen-removal

Once the four screws are removed, the screen fascia is carefully pulled apart. The circumferental clips are made of quite flimsy looking plastic so it’s wise to be careful.
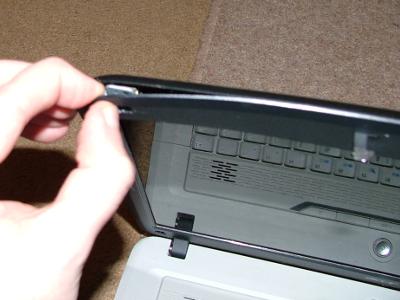
acer-5315-screen-removal-2

There is a connector at each end of the inverter board. These connectors were pulled out now. They are keyed to assist reinsertion later.
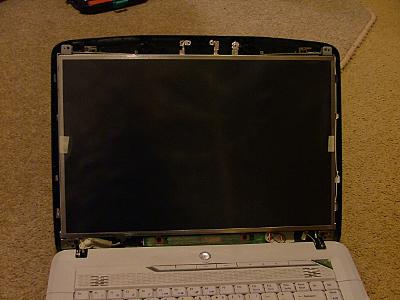
acer-5315-screen-removal

With the fascia off, the remaining screen securing screws are visible. The bottom two plus the inverter-board securing screws need to be removed. The back of the screen can then be pulled down further and laid flat.
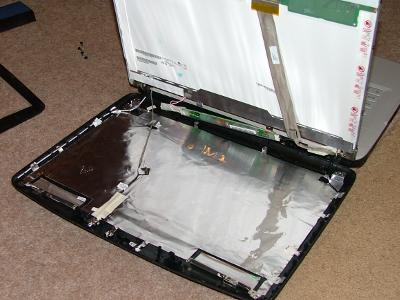
acer-5315-screen-removal-4

The video connector is held in place on the top of the back of the screen with a clear adhesive patch. I carefully peeled the patch away from the screen from the top downwards. Do not remove the patch from the connector itself. Taking a careful hold of the connector, I pulled downwards to free it.

There were now 8 more screws in the side of the screen holding it in place on the hinge frame. I remoed them from bottom to top so that the screen was supported as long as possible. With the screws out, the screen can be removed.
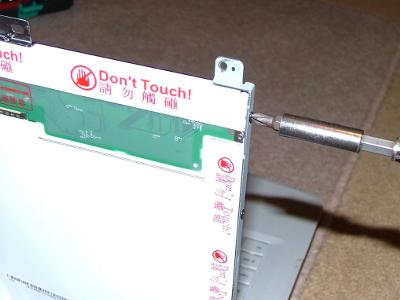
acer-5315-screen-removal-5

In the case of the replacement display I had, there was a clear cellophane protective cover taped onto it. I left this on while preliminary reassembly was performed.

I inserted the screen back into the hinge frame and refitted the screws, I worked from top to bottom to keep support on the screen, at all times being careful not to slip and run a screwdriver into the screen surface! 😉

Once the screen was secured to the hinge, I reinserted the video connector. In my case, a surprising ammount of force and care was required to get the connector all the way in. The likely symptom of a mis-inserted connector would be an all-white screen on power up. With the connector back in place, the adhesive pad was carefully pressed to the back of the screen. Bear in mind at this point that pressure had to be applied against some very sensitive electronics.

The inverter board was reconnected and refastened to the screen backplate. Care was taken to make sure all contacts are made and the wires taped back into place. This was the last opportunity for a test prior to final reassembly. I reinserted the two lower screws for the screen and the two upper screws which would normally also hold the screen in place before trying a test:
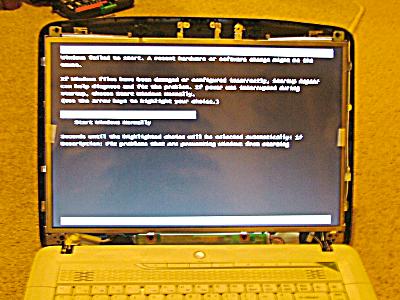
acer-5315-screen-testing-2

All was working, so I removed the battery again and the two top/front screws from the panel. I then removed the plastic cover that had come with my screen.

Care should be taken when refitting the fascia that all of the cables that pass through the screen hinges are located in the troughs and that they will not be pinched by the hinge or fascia. Replacement of the fascia is the reverse of the removal process. I gently pressed the fascia back together with fingers only and then reinserted the four retaining screws around it’s periphery. Finally, I reattached the adhesive rubber pads over the screw points.

Remember, machines under warranty should be repaired by service calls. Any work is attempted at your own risk.

To prevent reoccurrance:

The Acer Aspire chassis is by no means the stiffest/sturdiest I’ve ever come across so to stop the same problem happening again, I recommend:

  • Sweep hand across keyboard prior to closing the lid to check for foreign objects
  • Close and open the lid using both hands at the outer corners working in unison. Use the minimum of force required
  • Never place items on top of the laptop when it’s lid is closed (or at any other time for that matter)
  • Never touch the screen with your finger or any other object

[ad name=”articlebox10″]

Packard Bell Easynote Keyboard Replacement MZ35/MZ36

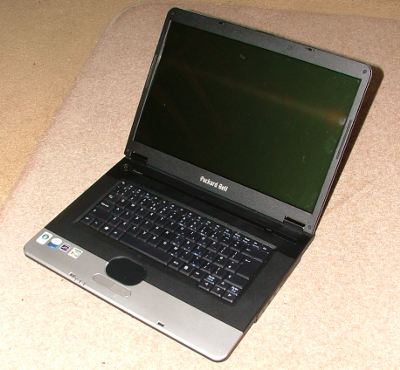
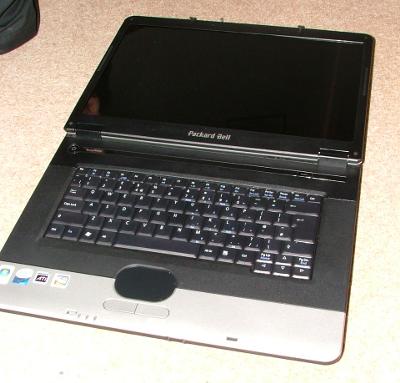
We recently had a Packard Bell Easynote (model identified as ‘Argo C2’ which seems to correspond with Packard Bell series MZ35 and MZ36 laptops) with a broken spacebar in for repair. We presumed it to be a complete keyboard replacement job so for your benefit, we detailed the procedure for getting the keyboard off the laptop.

easynote-c2

Tools required are basically a Phillips head screwdriver of suitable dimensions and a narrow, flat blade or similar prying tool.

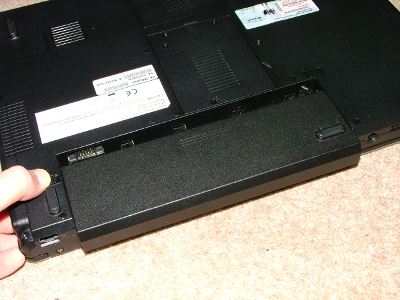
We started out by turning the laptop over and removing the battery. The battery is located on the back edge and has a thumb-operated spring-loaded latch on the bottom surface of the laptop. The battery withdraws to the rear.

easynote-battery-removal

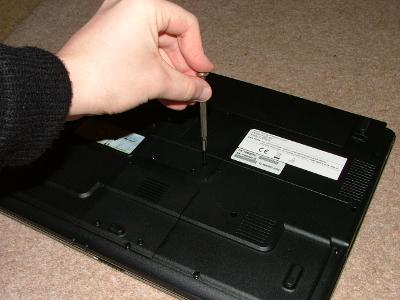
Next we needed to remove the keyboard retaining screw which (IIRC) is marked with a small keyboard legend. It is found roughly centrally on the underside of the laptop. Note that we had actually forgotten to remove the battery at this point /me smacks hands all round.

easynote-keyboard-retaining-screw

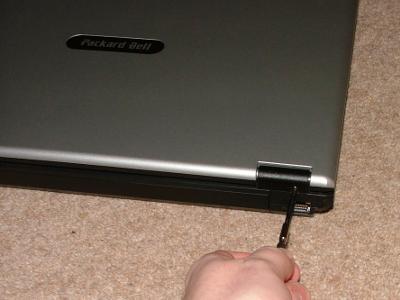
After putting the screw somewhere safe, we turned the laptop back over and with the lid closed, removed the hinge-cover retaining screws from the rear of the laptop.

easynote-cover-retaining-screw

Next, we carefully opened the laptop lid all the way.

easynote-lid-open

Once fully open, we used the prying tool to carefully lift the hinge covers which are an integral part of the upper cover on the laptop.

easynote-prying-up-the-cover

The whole cover should hinge from the keyboard side. We lifted the cover slightly and withdrew it away from the keyboard, towards the screen. The cover just removed acted as a secondary retaining feature for the upper edge of the keyboard.

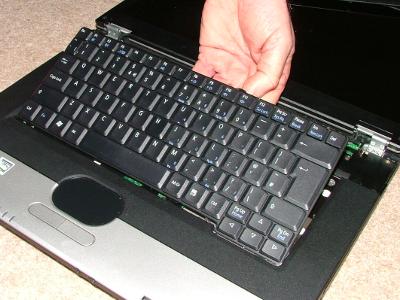
The keyboard was lifted from the edge nearest the screen, slight screenwards motion was employed to release the keyboard from the lower edge.

easynote-lifting-keyboard

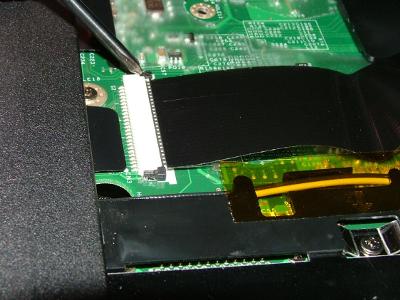
The keyboard ribbon cable is now visible. The ribbon is fastened using a black locking tab/collar.

easynote-keyboard-removal

We very carefully release the locking collar with a screwdriver. Usually working it back from each edge in turn works well.

easynote-keyboard-removal2

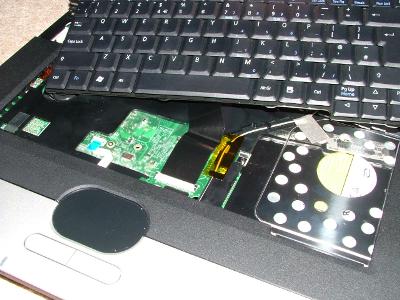
The keyboard could now be fully removed. The exposed internals of the laptop at this point are shown below.

easynote-keyboard-removed

The keyboard refitting procedure is the reverse of the removal procedure. Special care is to be taken when re-seating the ribbon cable and cover clips.

The usual disclaimer applies plus the caveat that it was a couple of months ago when this procedure was performed and my memory may be slightly rusty on it. Don’t forget, if your device is still under warranty, you’re best off getting a service call.

[ad name=”articlebox10″]
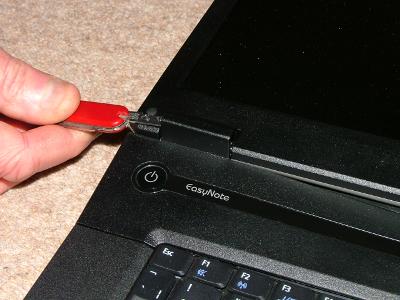
Dell M90 with dotty graphics

We’ve had a Dell Precision M90 laptop kicking around here for a fair while now with faulty Quadro FX 2500M graphics output. When the machine is powered on, the laptop’s LCD remains blank although the backlight is obviously powering up. If an external screen is connected, a picture is displayed at the POST screen but it is overlaid / disrupted by strings of what look like dots, commas or exclamation marks.

Since the machine is out of warranty and what we clearly have is a faulty graphics card, the question is now – why?

On extensive searching of the web, it seems that this problem is common to many of Dell’s high-end laptops with discrete GPUs and to date there does not seem to be a solid fix from Dell other than to change the graphics card (which may again fail) and update the machine’s BIOS to alter the fan’s duty cycle in the hope of reducing the thermal load.

This post and selection of comments on popey.com gives a little insight with people who have had warranty exchanges on their Dell laptop graphics cards reporting repeat failures later on. One interesting comment mentions the possibility of the components expanding significantly due to the heat and coming into contact with one-another where they shouldn’t causing an electrical short. Having looking at images and diagrams of the graphics card installation which attaches to a socket in the face of the motherboard, I’d be inclined to agree that it is a possibility.

I will hopefully know more once I have dismantled the M90 and gone fishing inside.